Custom Background & Logo Embedding
What you’ll learn
Hi there! In this article, we’re going to cover a powerful Pro feature – custom backgrounds & log embedding. This will make your brand stand out when you share files and collaborate with others!
Here’s specifically what we’ll cover:
- How you can access the customization feature.
- How you can add your logo to your web desktop.
- How you can upload custom images to your web desktop.
Ready? Let’s dive in.
Prerequisites
- You need to have a Pro license with an active subscription (learn more about Pro).
- You need to be the Owner or Manager of the web desktop you’d like to customize (learn more about Access Permissions).
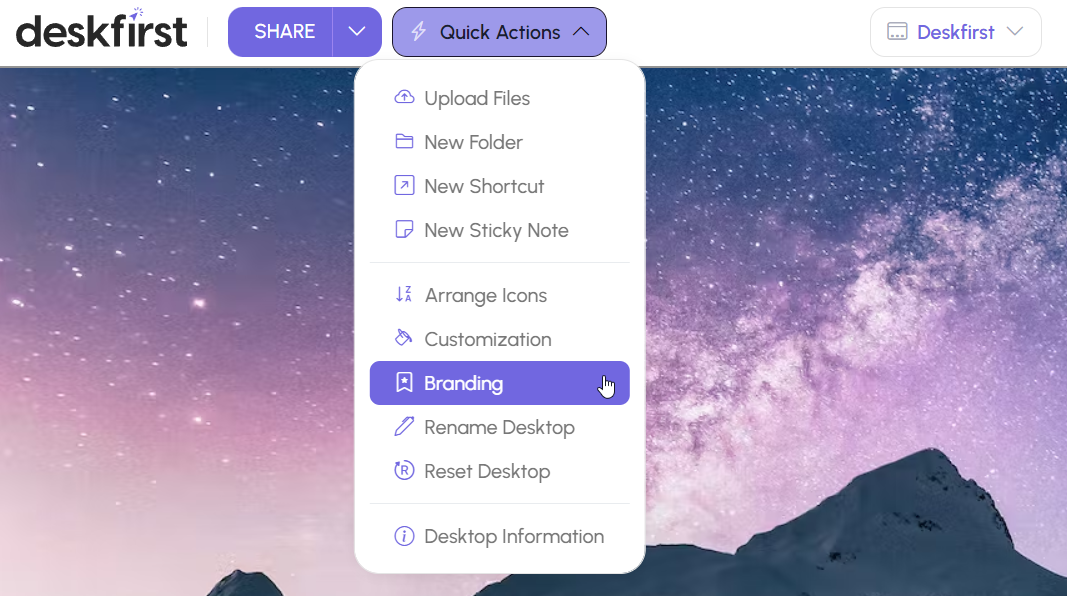
Access the customization menu
- Click on the Quick Actions button on the top menu.
Alternatively, you can right-click with your mouse on the background area of the web desktop (not on files and folders) - Click on Custom & Logo.

- Click on the switch to enable customization.

- Continue to the next section based on the type of background customizattion you like to apply.
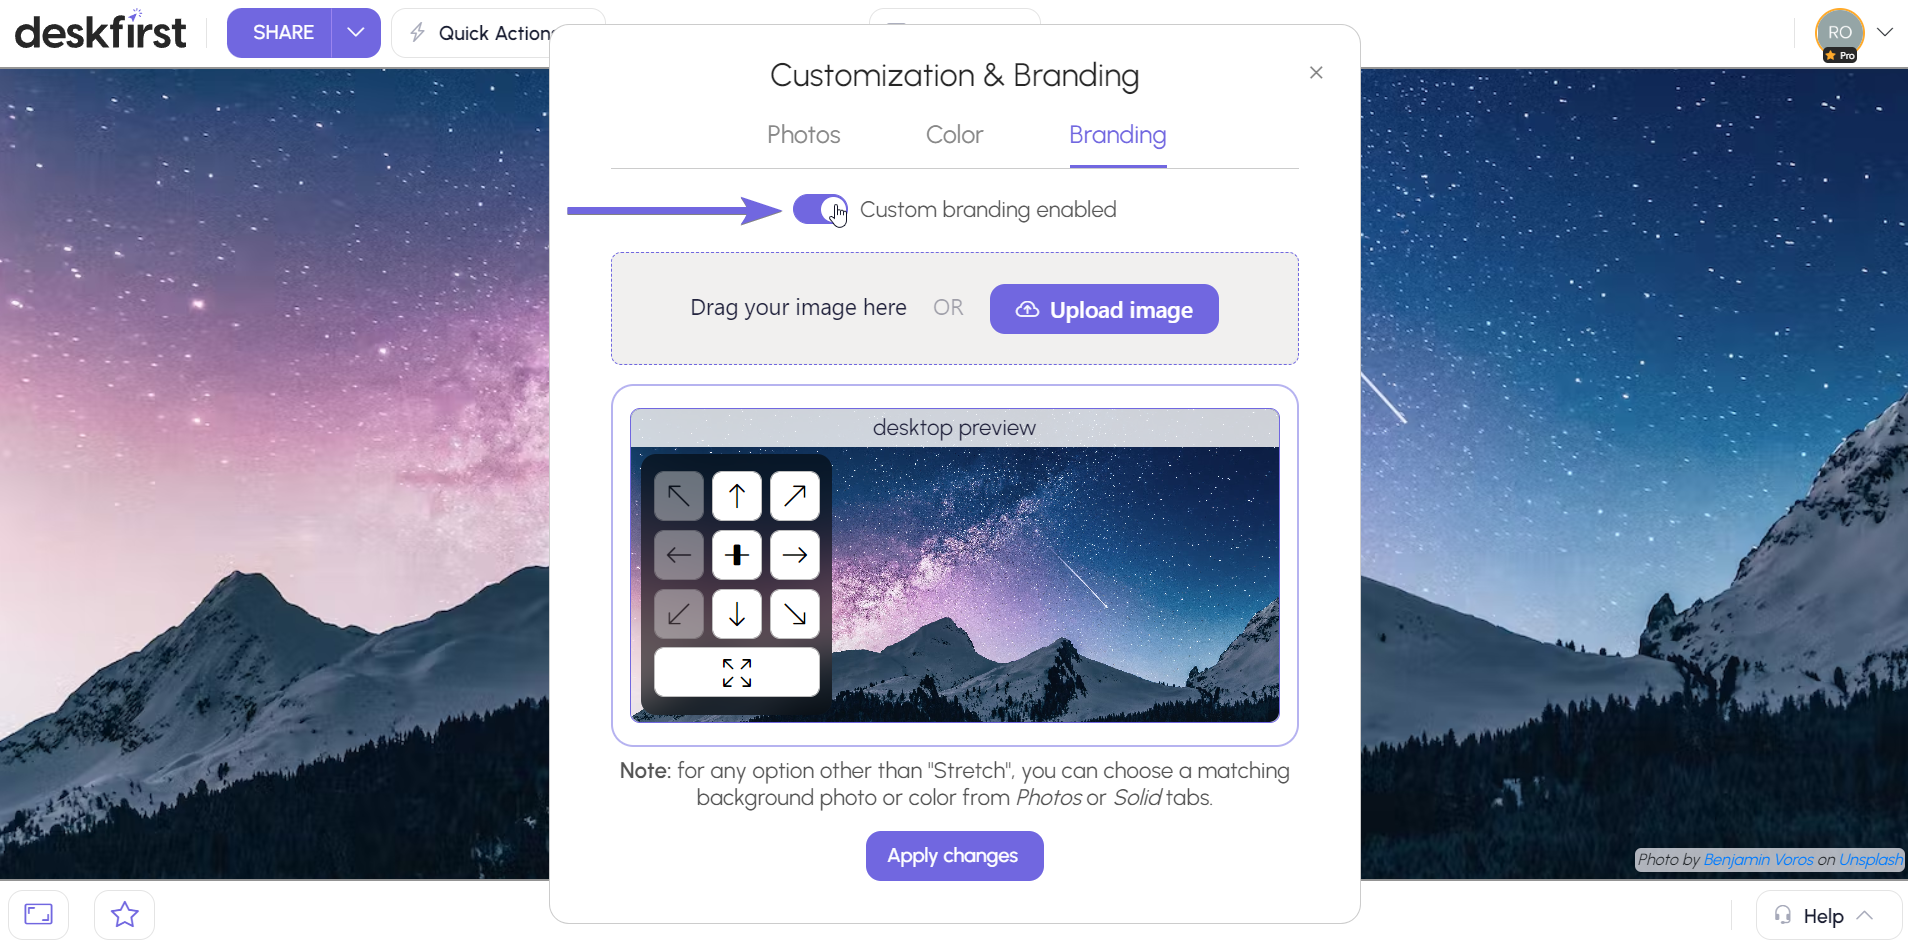
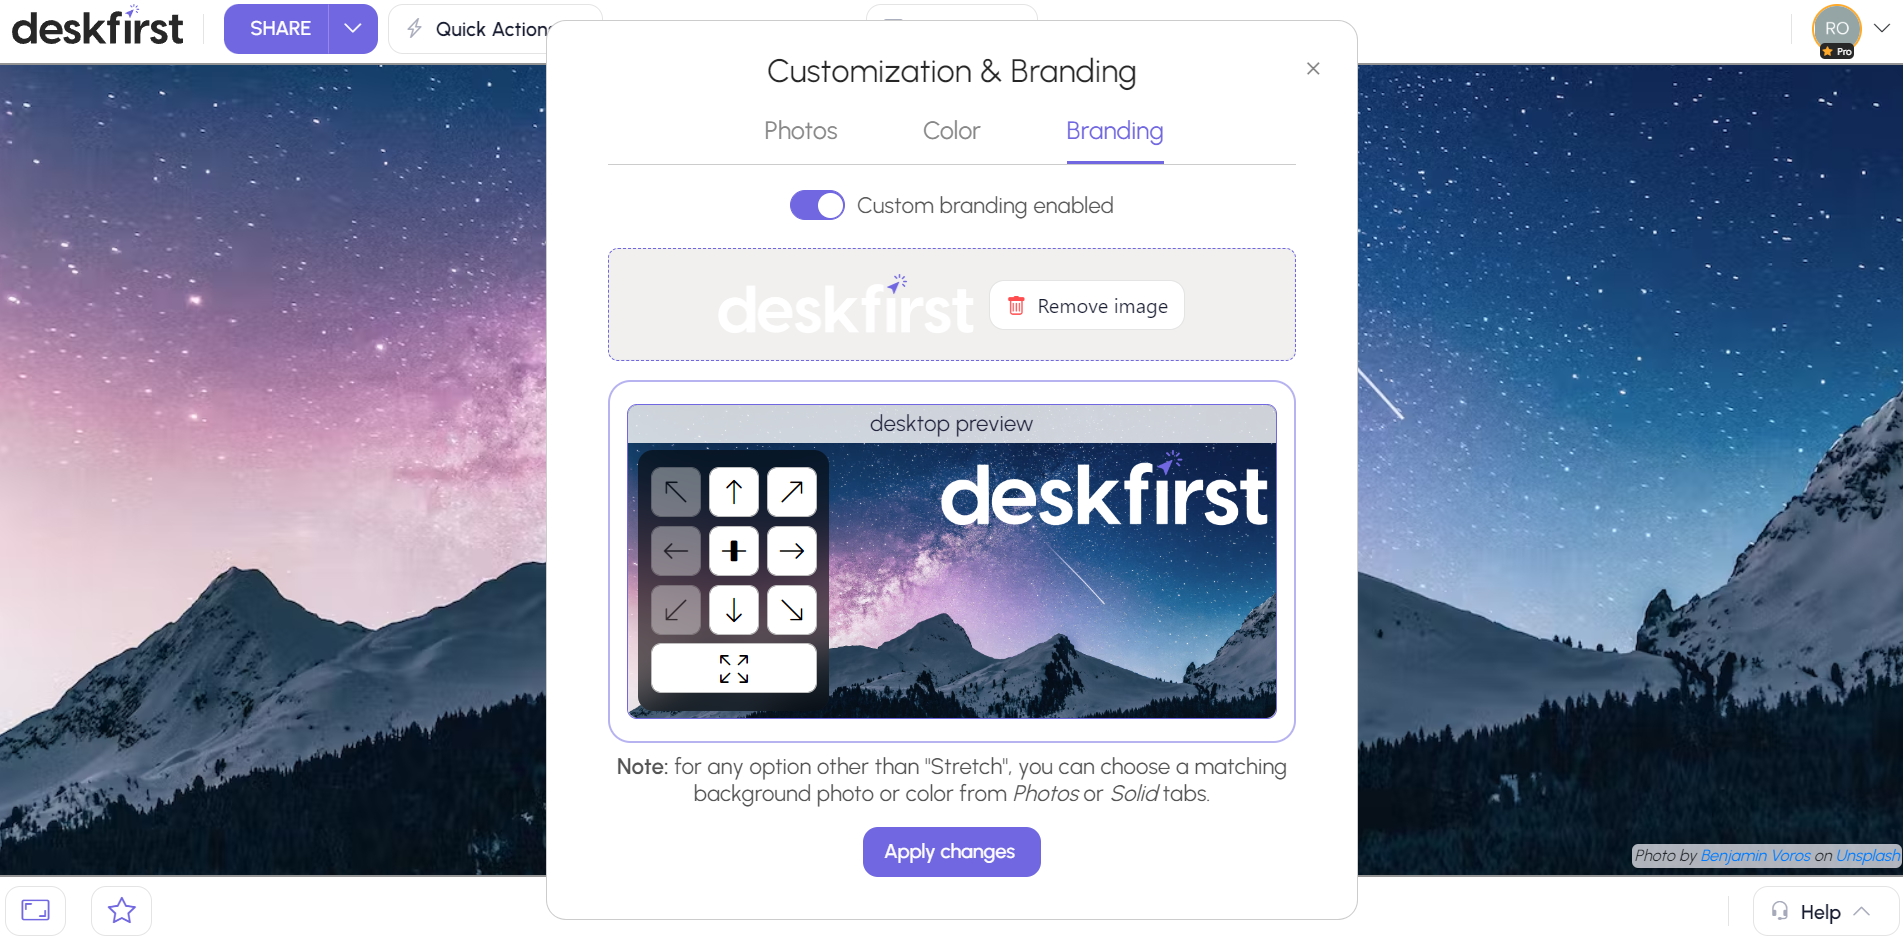
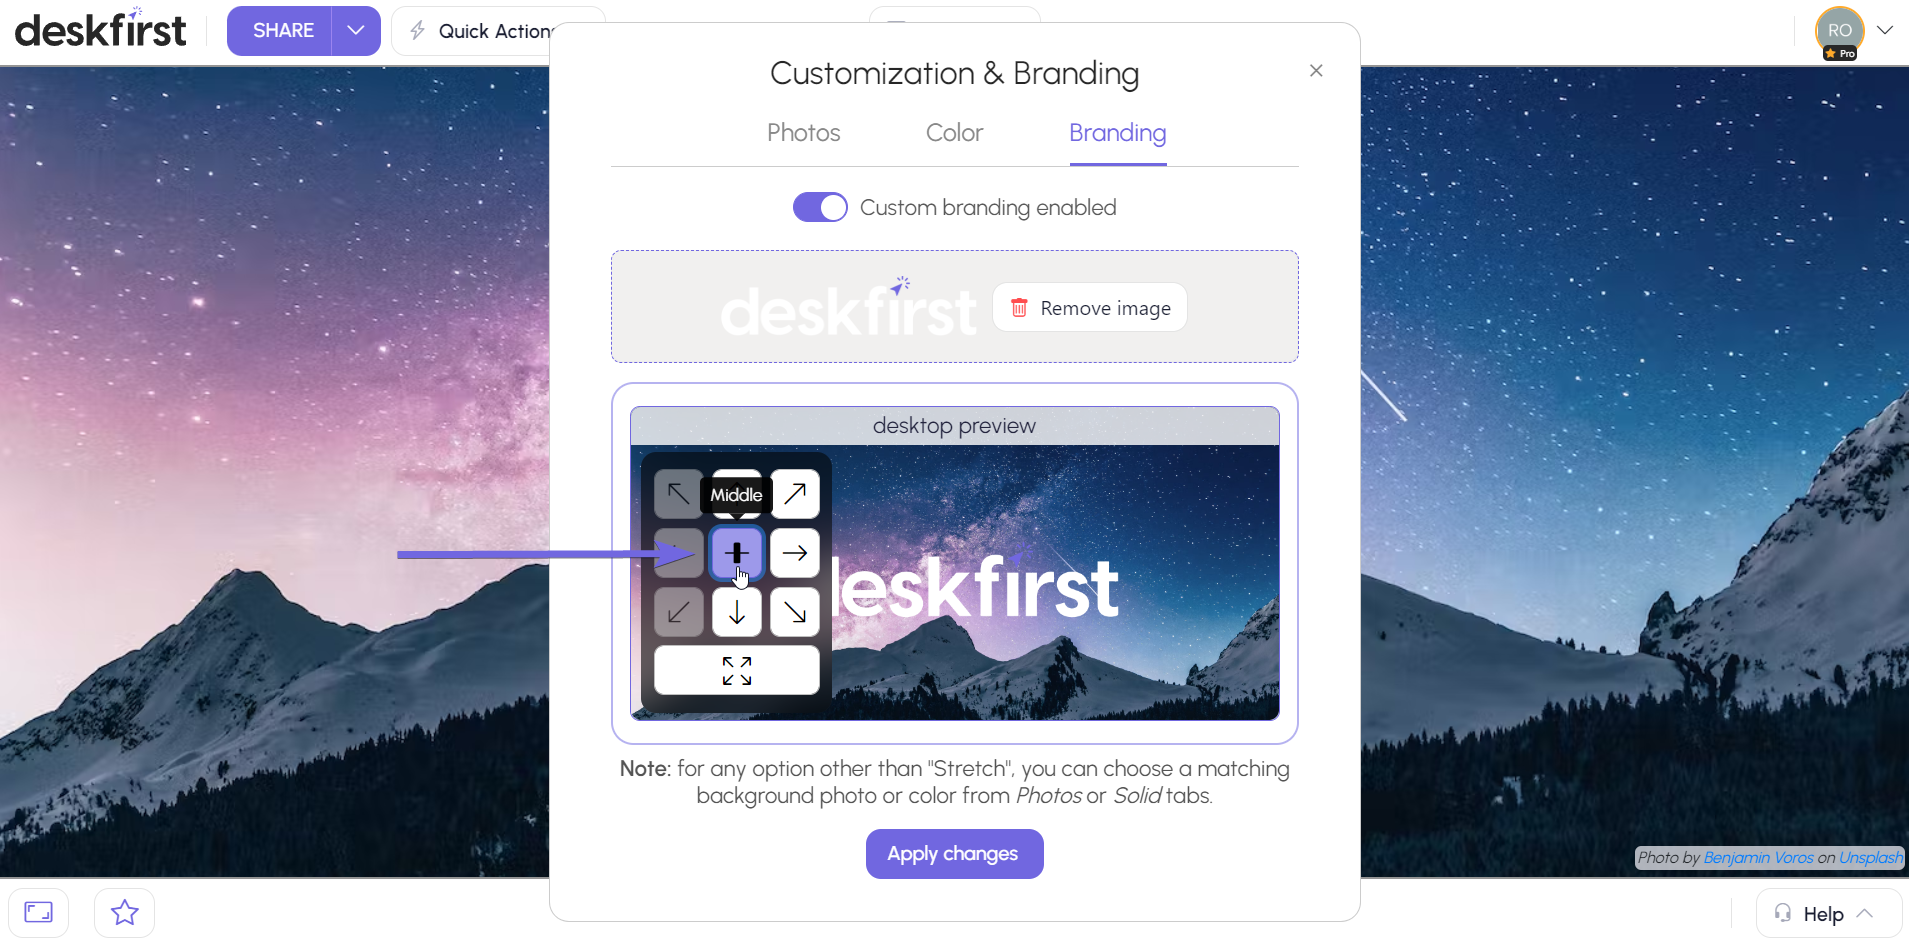
Embed logo on background
The first option for custom branding is to upload a logo that will appear on top of an Unsplash background or a solid color you previously selected.
- Drag the logo you want to upload to your web desktop to the grey area that says Drag your image here.
Alternatively, you can click the Upload Image button and navigate on your computer to the logo file.

- Optional – you can change the logo’s alignment by clicking on one of the arrows that appear in the Desktop Preview window.

- Click Apply changes. Your logo is now visible to anyone who has access to that web desktop!


Set custom cover image
The second option for background customization is to upload a custom image that will serve as a cover image.
If you want a custom image as a background together with a logo, embed your logo into the custom image using an image editing tool before uploading it to your web desktop.
As a thumb rule, it’s best to place your logo in the center of the custom image. If you choose to place the logo on one of the corners, it may be cut off due to different scaling on different screen sizes.
- Upload the image you want by clicking Upload Image
- In the Desktop Preview window, click on the Stretch option.

- Click Apply Changes. Your custom image is now visible to anyone who has access to this web desktop!


Need a hand?
If you’re still struggling, we’re always here for you! Refer to Getting Help from Deskfirst to learn how you can reach out to us.
And one more thing, we love talking to you guys and we love your feedback!
Never hesitate to share your opinion whether this article helped you or not, always feel free to suggest more support topics you believe we should cover, and tell us about every feature you’d love to have that’ll make Deskfirst even better for you!