Reallocating Storage Capacity
What you’ll learn
Hi there! In this article, we’re going to cover:
- How you can reallocate the storage capacity of the web desktop you’re currently in.
- How you can reallocate the storage capacity of any web desktop that you own using the Desktop Manager.
Prerequisites
- You need to have a Pro license with an active subscription (learn more about Pro).
- You need to be the owner of the web desktop in which you’d like to reallocate storage space (learn more about Access Permissions).
- To increase the storage capacity of a web desktop, you must have unallocated storage in your account.
- To decrease the storage capacity of a web desktop, you must have free, unused storage in it.
Reallocate the current web desktop’s storage capacity
Using this option will allow you to reallocate storage capacity only in the web desktop you’re currently viewing.
- Click on the Quick Actions button on the top menu.
Alternatively, you can right-click with your mouse on the background area of the web desktop (not on files and folders).
- Click on Desktop Information.

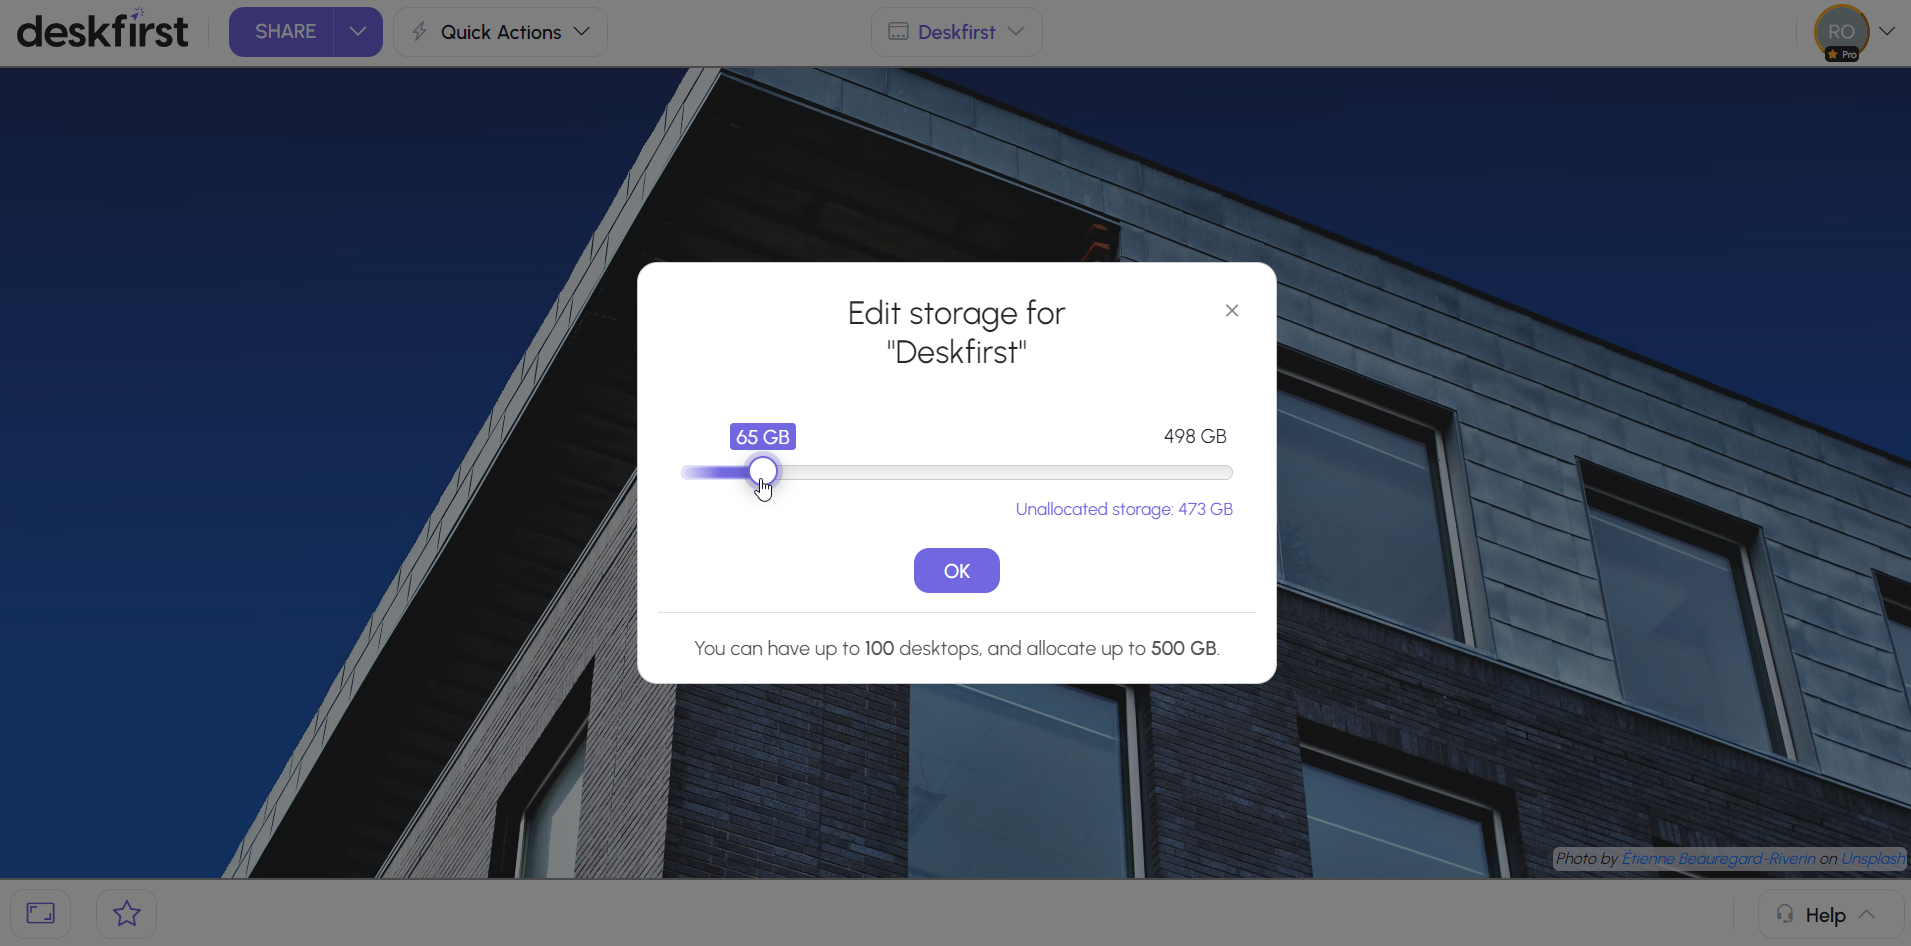
- Click on the pen button next to the web desktop’s current allocated storage capacity.

- Drag the slider left or right to decrease or increase the allocated storage capacity, respectively.

- Click OK to apply changes.
- A popup will appear confirming that storage capacity has been successfully allocated. Click OK.


Reallocate any web desktop’s storage capacity
Using this option will allow you to reallocate the storage capacity of any web desktop that you own, from a centralized dashboard.
- Click on the Current Desktop button on the top menu.
Alternatively, you can click on the profile button on the top menu.
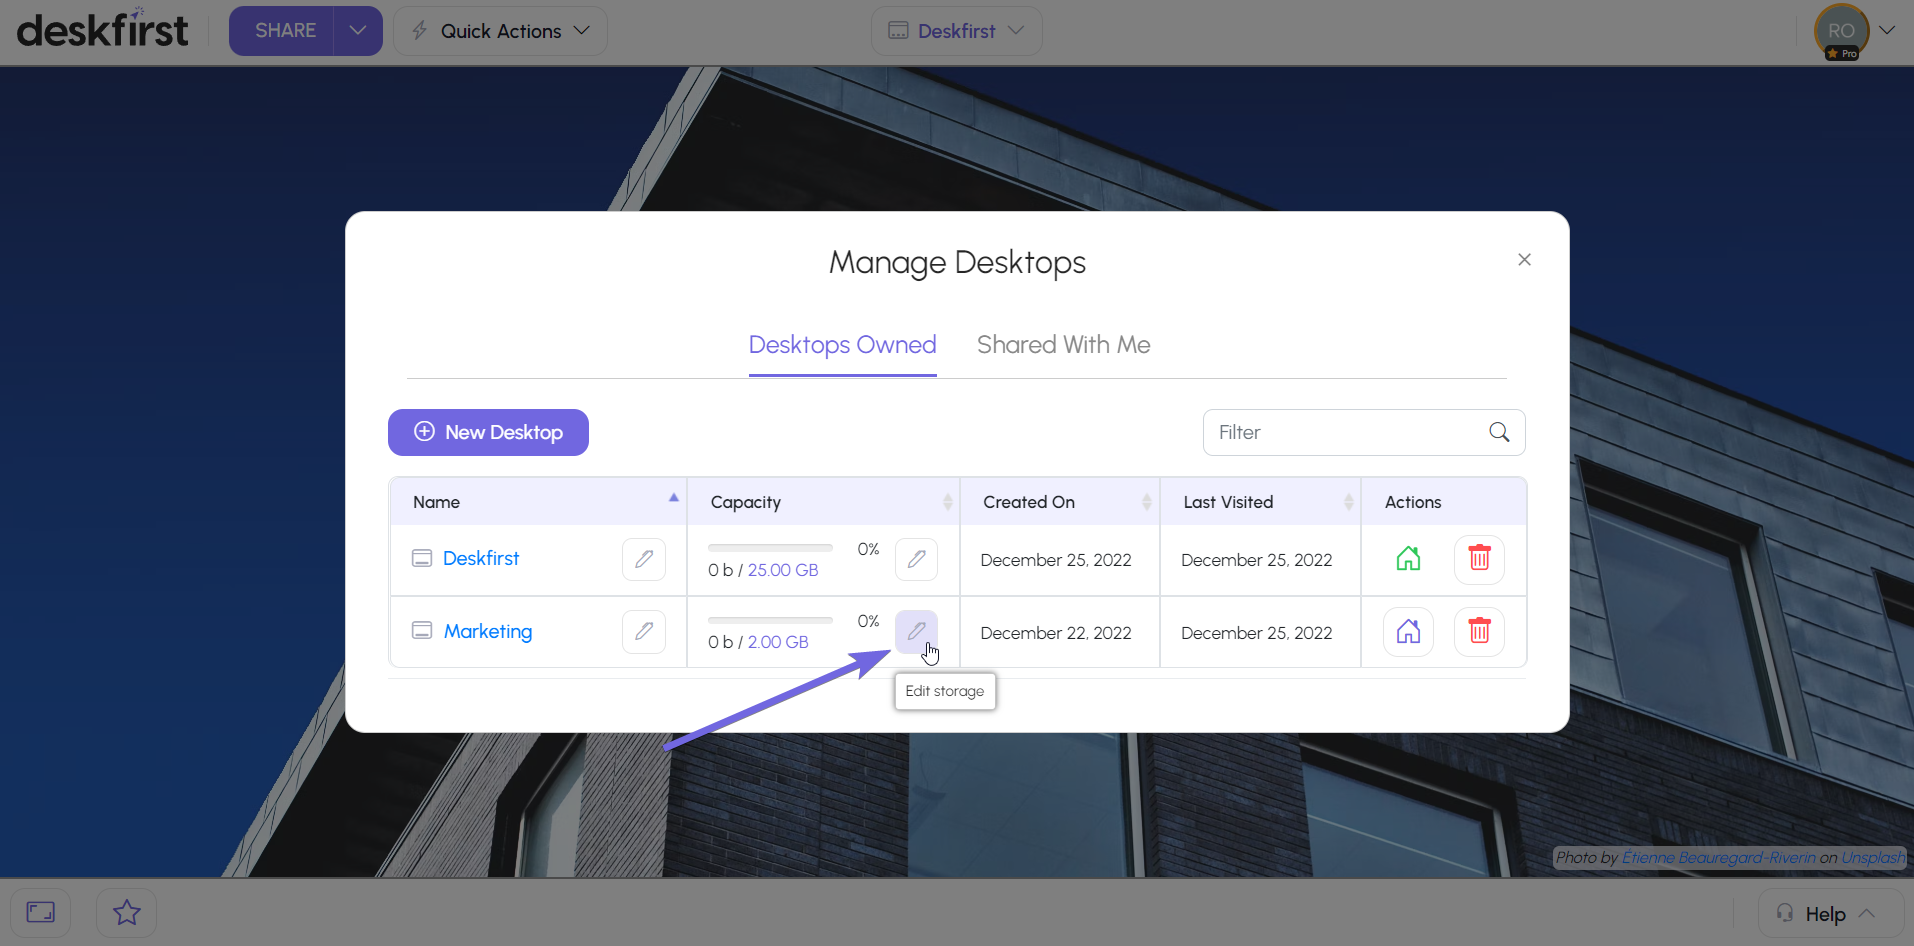
- Click on the Desktops Manager button.

- Locate the web desktop in which you’d like to reallocate storage space.
- Click on the pen button next to the web desktop’s current allocated storage capacity.

- Drag the slider left or right to decrease or increase the allocated storage capacity, respectively.
- Click OK to apply changes.
- A popup will appear confirming that storage capacity has been successfully allocated. Click OK.

Note: if you had a Deskfirst account with the Starter Plan and you were upgraded to the Pro Plan by being added to a Team, you will still have a free default web desktop - the one that was automatically created for you when you signed up.
If you want to reallocate storage space in this web desktop, it will be considered a Pro web desktop as well and will no longer be considered a free web desktop. If you are ever downgraded back to the Starter Plan, this may have an impact on you - learn more about What Happens When Pro Is Cancelled?.
Need a hand?
If you’re still struggling, we’re always here for you! Refer to Getting Help from Deskfirst to learn how you can reach out to us.
And one more thing, we love talking to you guys and we love your feedback!
Never hesitate to share your opinion whether this article helped you or not, always feel free to suggest more support topics you believe we should cover, and tell us about every feature you’d love to have that’ll make Deskfirst even better for you!